

SCRATCH HARDNESS TESTER 430 P-II-Smart
Order number: 03240231-
Non-Binding Inquiry
With the button below you can add products to your product inquiry list if you want us to do a quote for this product.
Note this product
Cross Hatch Cutting and Adhesion Testing
SCRATCH HARDNESS TESTER 430 P-II-Smart
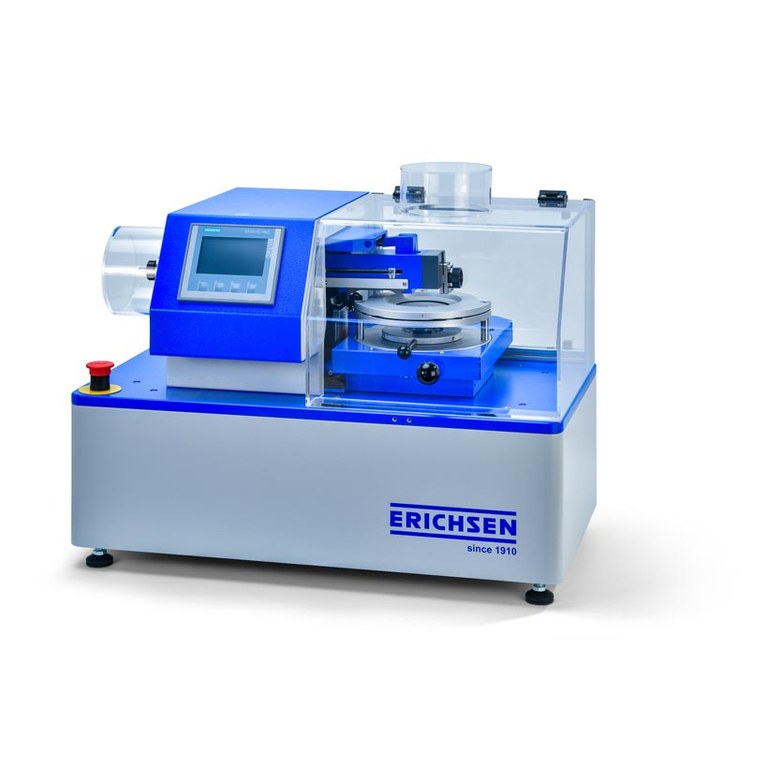
The electromotive SCRATCH HARDNESS TESTER 430 P-Smart is an all-purpose tester for the scratching and cutting jobs of all kinds on paint coats and plastic surfaces. Individual cuts, parallel cuts and (after rotating the sample 90°) also cross-hatch cuts can all be made onto test plates of different thicknesses. The scratch hardness tester 430 P-Smart is specially designed for adhesion tests (using the cross-hatch method, according to all common standards) and for special plastic tests according to Opel (scratch resistance and writing effect). There are many adjustment options on the basic unit as well as a wide range of testing tools available for this and further tests. The scratch hardness tester 430 P-Smart results in a significant reduction in workload when you are carrying out series tests. The test results are reproducible and meaningful.
Design and Function
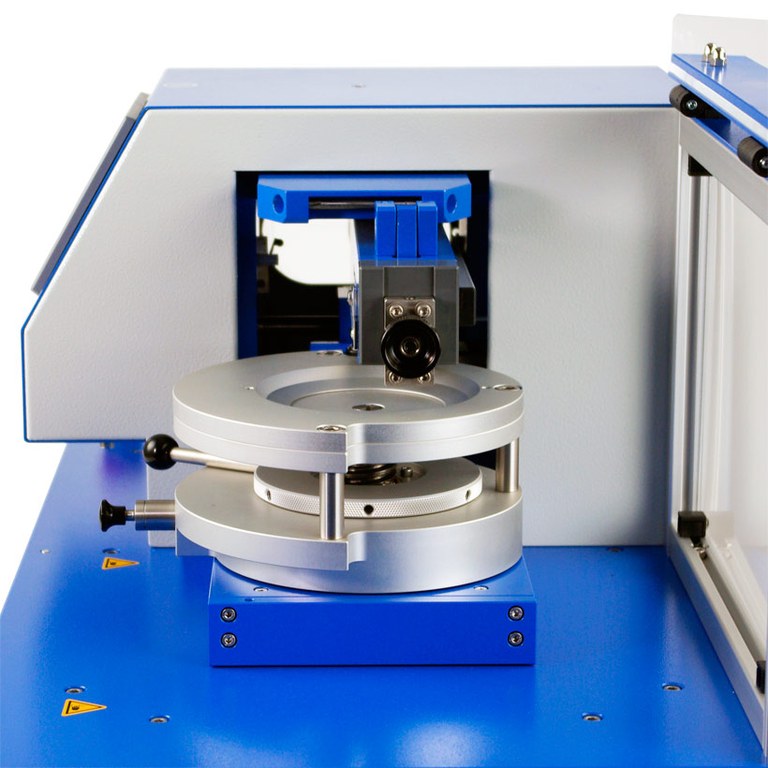
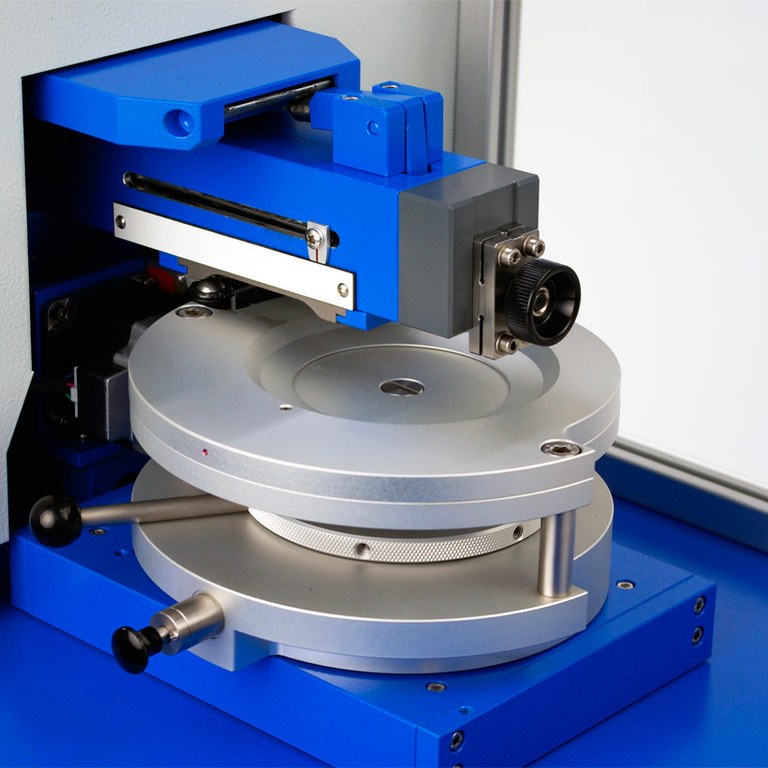
The SCRATCH HARDNESS TESTER 430 P-Smart is a benchtop instrument of sound mechanical construction which provides reliable, well-defined cuts, even under extreme test conditions. By default, the machine is equipped with a protective cover. The device is operated via touch panel (automatic menu navigation).The test procedure is carried out automatically and all parameters (cutting speed, cutting stroke, cross-cut pattern) can be set using the keyboard. Each motion sequence (transport of test panel, cut positioning and any required pressure adjustment) is driven by a separate step motor. During the test the specimen is conveyed linearly and at a constant speed under the test tip which has been set at the required pressure load (max. 40 N). A transmission guide ensures that the test tip is lowered onto the test panel as defined. The scope of supply includes two control plates for different cross-cut patterns which can be easily interchanged. With Model 430 P-Smart parallel cross hatch cuts with graduated test forces are possible. After carrying out the first cross hatch cut the instrument can be stopped and the test force (up to 50 N) can be adjusted individually before starting the next test track. Theoretically, 80 test tracks with a distance of 0.5 mm of different test forces are possible within the pre-selected cross hatch cut programme. The SCRATCH HARDNESS TESTER 430 P-Smart is power-driven and obtainable in four versions - with manual or with motor-driven force regulation and with manual or motor-driven test panel turn. On the manual version it is a simple matter to adjust the test force to the exact pressure. The instrument with motor-driven force regulation provides the additional benefit of conducting a trial run with gradually increasing force. In this way, the force required to achieve a through cut can be automatically ascertained in the course of a "trial cut". A 6-piece weight set is available as an optional accessory for conducting special tests in the lower pressure range and enables cuts with test forces in the range (1 - 15) N - graduated in 1-N steps.
Special Features
- 2 cutting speeds and 2 cutting lengths which can be combined as required
- 9 preset cross-cuts in compliance with the most commonly used standards
- 1 freely programmable cross-cut pattern for special applications
- Setting for cut distance with step motor precision
- "Stop"-option within the cross hatch cutting mode, for individually changing the test force for the next scratch track of the concerning current cross-cut pattern
- Visual display upon cutting through insulating layers to metal substrate
- Rapid clamping device for test panels, with wide clamping range.
Cross Hatch Testing
The SCRATCH HARDNESS TESTER 430 P-Smart enables cross hatch tests to be conducted in accordance with all the usual standards, summarized in the following table, and carried out immediately without additional programming. The following cross-cuts can be selected by pressing a key (number of cuts x distance in mm between cuts) 2 x 5, 6 x 1, 6 x 2, 6 x 3, 8 x 1, 8 x 2, 11 x 1. The cuts are carried out automatically in succession using the test tip for cross hatch at a cutting speed of 40 mm/s. After turning the test panel manually by 90°, the procedure is repeated to complete the cross-cut pattern. The load required to ensure that the layer of varnish will be cut through to the substrate must be ascertained in trial runs. With Model 430 P-II-Smart or Model 430 P-IV-Smart (motor-driven force adjustment) this can be carried out very simply by performing a "trial cut". For the examination of cross hatch cuts a magnifiying glass with 2.5 magnification is included in the scope of supply. To evaluate the cross hatch pattern achieved, it is visually related to a comparison pattern within a scheme indicated in the relevant standard (cross cut classification). In ECCA T6 it is mentioned that the cross hatch cut test may be intensified by a subsequent cupping test according to DIN EN ISO 1520. For this purpose we recommend the ERICHSEN Lacquer and Paint Testing Machines, models 200 and 202 EM. Although the results of adhesion tests in accordance with the cross hatch method are comparable with each other, they are - due to their respective procedures - not transferable to results of alternative test methods (e. g. perpendicular pull-off test according to DIN EN ISO 4624). The ERICHSEN production programme offers the following model for adhesion testing to the pull-off method:
- Adhesion Test Apparatus, Model 525 (manual / inexpensive)
| Standard | Layer thickness | No. of cuts x distance (mm) |
|
DIN EN ISO 2409 JIS K 5600-5-6 |
up to 60 μm over 60 μm to 120 μm |
6 x 1 (for soft substrates) 6 x 2 (for hard substrates) 6 x 2 6 x 3 |
| ASTM D 3359 | up to 50 μm over 50 μm to 125 μm |
11 x 1 6 x 2 |
| SNV 37111 | up to 60 μm over 60 μm |
8 x 1 8 x 2 |
| VDA 621-411 | up to 60 μm over 60 μm to 120 μm over 120 μm |
6 x 1 6 x 2 6 x 3 |
| ECCA T6 | up to 50 μm over 50 μm |
6 x 1 |
Scratch Resistance Testing
For testing scratch resistance in accordance with Opel (GME 60280 / GMW14688) the test tip with a 1 mm ∅ is selected together with the preset grid "20 cuts at a distance of 2 mm" (20 x 2). The stress pattern in this case is applied with a test load of 5 N (set of weights) by the same procedure as for the cross hatch test (cutting speed 1m/min). To analyse the scratch resistance test the brightness variance (∆L) is determined in comparison with the plastic surface which is not subjected to strain. The colour measuring device to be used for this purpose must fulfil the following requirements: illuminant D65, measuring geometry d/8 with gloss exclusion, measuring aperture ∅ 27 mm.
Writing Effect Testing
For testing the writing effect in accordance with Opel the test inset offered as optional accessory, is required. This inset has to be mounted on the load arm instead of the tool holder. The stress pattern is applied with the preset grid "80 cuts at a distance of 0.5 mm" (80 x 0.5) and a test load of 7 N (set of weights) analogue to the cross hatch test (cutting speed 1 m/min). To evaluate the result of the writing effect test the gloss difference is determinded in comparison with the plastic surface not subjected to strain. The gloss meter used should be provided with a 60° geometry; the measuring area must be small enough to allow carrying out reproducible gloss measurements on the surface subjected to strain. For this test purpose all the ERICHSEN glossmeters of the PICOGLOSS family are highly recommended.
Special Tests
Deviating from the determinations of the above mentioned tests (cross hatch test, scratch resistance, writing effect) further scratch tests can be carried out varying the following parameters:
- Test tip
- ball test tool ∅ 0.5 / 0.75 / 1 / 3 mm
- asymmetric test tools: cross cut / Clemen
- Test load
- rough range 50 N with 2 N graduation (standard)
- fine range 15 N in 1 N steps (optional)
- Cutting grid
- preset, selectable by depression of key: 2 x 5, 6 x 1, 6 x 2, 6 x 3, 8 x 1, 8 x 2, 11 x 1, 20 x 2, 80 x 0.5 (number of cuts x distance in mm)
- freely programmable: all grids max. width 40 mm and a multiple of 0.5 mm as cutting distance
- Cutting pattern
- parallel cuts or cross cuts
- Cutting path
- 25 mm or 40 mm (exchangeable guide plates)
- Cutting speed
- 16.7 mm/s (1 m/min) or 40 mm/s
In order to minimize testing time, the smallest possible length of cut is always selected, together with the relevant connecting member.
Operation via App
The innovative optimized control concept of the Models 430 P-Smart allows the operation per smartphone or tablet via App (free download at: Google Play Store / Apple Store), as well as a different form of settings, documentation and data management.
Reference Class
All versions of the SCRATCH HARDNESS TESTER 430 P-Smart are supplied with a Calibration Certificate in accordance with DIN 55350-18 that includes among others the following information:
- Actual and setting values of loading force
- Scratching speed and cutting distance
- test equipments used with calibration status
- product indentification
- date
- name of inspector
Comparisons of the setting/actual values for the following parameters are made:
- Loading force (5 setting values evenly distributed over the load range)
- Cutting speed (both desired values in combination with both cutting paths)
- Cutting distance (exemplary for setting value 0.5 mm)
Scope of delivery
- SCRATCH HARDNESS TESTER 430 P-II-Smart, motor-driven turntable and cutting position and with motor-driven adjustment of loading force and manual turning of test panels and control plate for cutting path of 25 mm and 40 mm, Load pressure max. 50 N
- Transport case with
- 3 Allen keys (SW 2 / 2.5 / 3)
- Connecting member for cutting path of 25 mm
- Folding magnifier (2.5 fold magnification)
- Recesses for set of weights, test inset (writing effect) and for max. 8 test tips
- Mains connection cable
- Operating instructions
Caution
- Test tips are not included in the scope of supply
- Please specify mains supply when ordering
Norms
- GME 60280 GM / Opel
- GMW 14688 GM / Opel
- PV 3952 VW / Audi
- PV 3974 VW / Audi
- PV 3962 VW / Audi
- D45 1047 Renault
- MS210-05K Hyundai / Kia
- STD 4377 Volvo
- ISO 2409 Common
Technical specifications
Drive
Electric
Scratch profile
Van Laar, Bosch, ISO, Clemen, etc.
Testing Force
1-50 N
Dimensions
approx. 725 x 560 x 425 mm (W x H x D)
Net weight
approx. 50 kg
Power supply
230 VAC / 50 Hz
Consumption
approx. 100 W - 150 W
Test panel format, min.
80 x 50 mm
Test panel format, max.
165 mm wide, any lenght
Thickness of specimen
0.5 - 20 mm
Standard load range
2 - 50 N (2 - N - grading)
Special load range
1 - 15 N (1- N - grading)
Cutting path
25 or 40 mm
Cutting speed
1 m / min or 40 mm / s
Equipment
Order number: 05640132
- 514.00 €
- Non-Binding Inquiry
Price excl. VAT. We sell to professional buyers
With the button below you can add products to your product inquiry list if you want us to do a quote for this product.
Note this product
Order number: 05390132
- 256.00 €
- Non-Binding Inquiry
Price excl. VAT. We sell to professional buyers
With the button below you can add products to your product inquiry list if you want us to do a quote for this product.
Note this product
Order number: 05390232
- 229.00 €
- Non-Binding Inquiry
Price excl. VAT. We sell to professional buyers
With the button below you can add products to your product inquiry list if you want us to do a quote for this product.
Note this product
Order number: 05390332
Mehr lesen...
- 250.00 €
- Non-Binding Inquiry
Price excl. VAT. We sell to professional buyers
With the button below you can add products to your product inquiry list if you want us to do a quote for this product.
Note this product
Order number: 05390732
Mehr lesen...
- 527.00 €
- Non-Binding Inquiry
Price excl. VAT. We sell to professional buyers
With the button below you can add products to your product inquiry list if you want us to do a quote for this product.
Note this product
Order number: 05390432
- 242.00 €
- Non-Binding Inquiry
Price excl. VAT. We sell to professional buyers
With the button below you can add products to your product inquiry list if you want us to do a quote for this product.
Note this product
Order number: 02180232
- 296.00 €
- Non-Binding Inquiry
Price excl. VAT. We sell to professional buyers
With the button below you can add products to your product inquiry list if you want us to do a quote for this product.
Note this product
Order number: 30770132
- 805.00 €
- Non-Binding Inquiry
Price excl. VAT. We sell to professional buyers
With the button below you can add products to your product inquiry list if you want us to do a quote for this product.
Note this product
Order number: 05391332
- 805.00 €
- Non-Binding Inquiry
Price excl. VAT. We sell to professional buyers
With the button below you can add products to your product inquiry list if you want us to do a quote for this product.
Note this product
Order number: 05390532
- 513.00 €
- Non-Binding Inquiry
Price excl. VAT. We sell to professional buyers
With the button below you can add products to your product inquiry list if you want us to do a quote for this product.
Note this product
Order number: 04300332
- 59.00 €
- Non-Binding Inquiry
Price excl. VAT. We sell to professional buyers
With the button below you can add products to your product inquiry list if you want us to do a quote for this product.
Note this product
Order number: 05390932
Mehr lesen...
- 922.00 €
- Non-Binding Inquiry
Price excl. VAT. We sell to professional buyers
With the button below you can add products to your product inquiry list if you want us to do a quote for this product.
Note this product
Order number: 05390832
- 470.00 €
- Non-Binding Inquiry
Price excl. VAT. We sell to professional buyers
With the button below you can add products to your product inquiry list if you want us to do a quote for this product.
Note this product
Order number: 05391132
- 1383.00 €
- Non-Binding Inquiry
Price excl. VAT. We sell to professional buyers
With the button below you can add products to your product inquiry list if you want us to do a quote for this product.
Note this product
Order number: 04300532
- 925.00 €
- Non-Binding Inquiry
Price excl. VAT. We sell to professional buyers
With the button below you can add products to your product inquiry list if you want us to do a quote for this product.
Note this product
Order number: 05391432
- 514.00 €
- Non-Binding Inquiry
Price excl. VAT. We sell to professional buyers
With the button below you can add products to your product inquiry list if you want us to do a quote for this product.
Note this product
Order number: 05391232
Mehr lesen...
- 618.00 €
- Non-Binding Inquiry
Price excl. VAT. We sell to professional buyers
With the button below you can add products to your product inquiry list if you want us to do a quote for this product.
Note this product
Order number: 08040232
- 93.00 €
- Non-Binding Inquiry
Price excl. VAT. We sell to professional buyers
With the button below you can add products to your product inquiry list if you want us to do a quote for this product.
Note this product
Order number: 30240132
-
Non-Binding Inquiry
With the button below you can add products to your product inquiry list if you want us to do a quote for this product.
Note this product
Order number: 05670132
- 1327.00 €
- Non-Binding Inquiry
Price excl. VAT. We sell to professional buyers
With the button below you can add products to your product inquiry list if you want us to do a quote for this product.
Note this product


